
Anthurium Pollination Guide: Timing, Pollen & Seeds
Hand-pollinate Anthurium by reading female and male phases, transferring pollen, choosing compatible parents, storing pollen cautiously, and sowing fresh seed.
Jordan Cole · Published 2025-12-13 · 14 min read
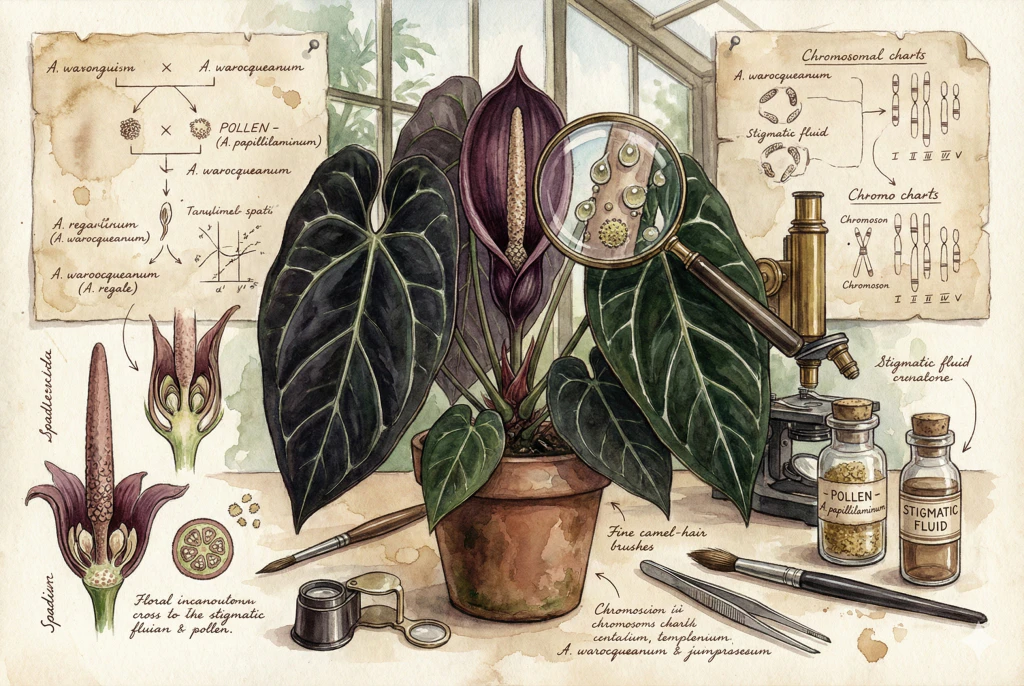
Key Takeaways
- The showy flower is the spathe, a modified bract, while the reproductive structure is the spadix carrying many tiny bisexual flowers.
- Anthuriums are protogynous, so stigmas become receptive before the same spadix releases pollen and you usually need pollen from another plant or from storage.
- Pollinate while the stigmas glisten with fluid because receptive flowers appear from the spadix base upward and may continue for roughly two weeks.
- Dry-and-frozen pollen storage is not validated for Anthurium, so test freezing only on a spare portion and keep a short-term refrigerated control for irreplaceable pollen.
- Section membership helps you choose a cross but does not guarantee compatibility, and recalcitrant Anthurium seeds should be sown fresh before they dry.
If you’ve invested in a collector Anthurium, a dark warocqueanum, a papillilaminum with topographic venation, and you’re now looking at a fleshy spike emerging from the petiole, you can try to breed from it.
Multiplying that plant is rewarding, but it takes patience and a bit of luck. Anthurium flowers separate their female and male phases in time (protogyny), which reduces self-pollination, so in practice you usually have to move pollen between plants, or store it, yourself.
Successful hand-pollination depends on three decisions. Identifying the receptive female phase, moving viable pollen without mixing parent records, and sowing mature seed before it dries. Pollen storage and section compatibility can improve the odds, but neither supplies a guaranteed protocol.
Read the Female and Male Phases
Hand-pollination is easier once you understand the anatomy. What looks like a single Anthurium flower is really an inflorescence, many small flowers packed onto a spike, so it does not work like a single tulip bloom.
The Spathe Is Not the Flower
That colorful heart-shaped petal is the spathe, a modified bract. Its color and form vary by species and are thought to help attract pollinators, though the specific visitors and cues differ from species to species.
The reproductive part is the spadix, the fleshy spike at the center, which carries many tiny individual flowers. The number depends on the size and species of the inflorescence.
The Hermaphroditic Paradox
The individual flowers on the spadix are typically bisexual. Each has both a pistil, including stigma, style and ovary, and stamens, including anther and filament. The timing of those parts explains why the plant does not simply self-pollinate.
Largely because it separates the two sexual phases in time (a mechanism called dichogamy) which reduces (though does not always eliminate) self-pollination.
Protogyny (The Timing Trap)
Read the Female Phase
Anthuriums are protogynous, so the female phase comes first and the stigmas become receptive before the anthers release pollen.
In this phase, the stigmas protrude and are wet with a stigmatic secretion. That glistening fluid is a useful visual cue that the stigmas are receptive. Its exact chemistry is more debated than often stated. A structural study of A. andraeanum did not detect the main sugars, sucrose, glucose and fructose, in stigmatic samples and distinguished stigmatic secretion from a separate tepalar secretion. Treat the fluid as a receptivity signal, not as a proven sugary reward or documented germination trigger.
Then comes an interphase, where the fluid dries and the stigmas turn brown as receptivity ends.
Only afterward does the male (staminate) phase begin, when the anthers emerge and release pollen, by which time that spadix’s stigmas are usually no longer receptive.
This staggering favors cross-pollination in the wild and creates a timing problem indoors, because a single spadix generally isn’t shedding pollen while its own stigmas are still receptive.
All Araceae are protogynous, but the duration in Anthurium varies enormously, from about a week to over a month. In some species the stigmas produce obvious droplets, while in others they only look moist.
True nectar or stigmatic secretion? Structural evidence elucidates an old controversy regarding nectaries in Anthurium
The Vectors (A Diverse, Poorly-Documented Group)
Wild Anthuriums are pollinated by different insects in different species. You do not need to identify the wild pollinator indoors. Hand pollination simply replaces that transfer by moving pollen to receptive stigmas.
Indoors, hand-pollination replaces that animal transfer by deliberately moving pollen from one spadix to receptive stigmas on another.
Chromosomes and Ploidy
Chromosome number and ploidy can differ even among closely related Anthuriums. Large differences can reduce fertility, but they do not reliably predict whether one particular cross will set viable seed.
Choose parents with compatible growth and flowering habits, then confirm compatibility by making a small, well-labeled cross rather than assuming section membership guarantees success.
Prepare a Clean Pollination Kit
Working under clean, recorded conditions makes results easier to interpret, and pollen is short-lived, so handle it gently and promptly.
Humidity, With a Caveat
Keep Humidity Steady
Anthuriums generally like humid air, and higher humidity may keep stigmatic fluid from drying too fast while drier air during the male phase may help pollen stay as loose dust rather than clumping. Specific humidity thresholds for extending receptivity or preventing pollen mold in Anthurium are not established, and UF/IFAS does not call for special humidity manipulation around pollination. Treat any numbers here as general growing ranges, not proven reproductive settings.
Keep the growing area humid overall. If you want drier anthers for pollen harvest, moving the plant somewhere a little drier or adding gentle indirect air movement may help surface-dry them. Introduce any such change gradually to avoid shocking or desiccating the plant.
Temperature and Light
Use Normal Growing Conditions
Ordinary good Anthurium growing conditions, roughly 70–80 °F (21–26 °C) with a modest night drop and bright indirect light, are a sensible backdrop. A healthy, well-lit plant will generally flower and set seed better than a stressed one. These are cultivation ranges, not measured pollination or fruit-set thresholds, and published Anthurium work has not established a specific PPFD or temperature that predicts seed set or abortion.
Choose a Clean Kit
UF/IFAS describes transferring Anthurium pollen with a fingertip, so elaborate tools are not essential. If you want a small kit, a dark smooth surface gives good contrast for pale pollen, soft silicone-tip applicators are easy to clean between plants, and microcentrifuge tubes are handy for holding pollen. Controlled Anthurium comparisons have not established whether acrylic, silicone or cotton differ in pollen recovery or contamination, so choose for convenience and cleanliness rather than a presumed performance advantage. Avoid tools that shed fibers into wet stigmatic fluid.
Use the female- and male-stage field guide to compare visible phase cues. A jeweler’s loupe can reveal surface texture, such as loose dusting versus fuzzy growth, but cannot tell whether pollen grains are alive. That requires germination, staining or actual seed set.
Lighted Jeweler’s Loupe
A lighted jeweler’s loupe is useful when the spadix is too small to read comfortably by eye. Pocket loupes in the 30×–60× range with built-in LEDs are a practical choice. Lower power gives a wider field for scanning droplets and anther texture, while the higher power resolves fine surface growth. Beyond magnification, check the field of view, working distance, and lighting, because a stated number alone does not guarantee usable detail.
Use One When
You repeatedly inspect tiny inflorescences and need a pocket-size lighted view of droplets, anther texture, or coarse surface growth.
Skip It When
A phone macro lens already shows those details, or you expect a viability test or a reliable pollen-versus-fungus diagnosis. No Anthurium evidence shows that a loupe increases seed set.
Transfer Pollen During Receptivity
Timing is everything, so work the phases.
Phase 1. The Watch
When the spathe unfurls, the spadix is glossy and smooth. Do nothing but watch for the texture to roughen as the tepals open.
Phase 2. The Female Phase (Receptivity)
Pollinate While Stigmas Glisten
This is the window to pollinate. Receptive stigmas appear first at the base of the spadix and progress upward. In UF/IFAS accounts, new receptive flowers can keep appearing over roughly two weeks, with each flower receptive for more than a day. Duration varies by species, so watch the spadix rather than assuming a fixed number of days. The key sign is stigmatic fluid, with tiny droplets or a faint sheen and sometimes a noticeable scent.
To pollinate, pick up pollen on a fingertip or a silicone applicator and gently touch it to the wet, receptive stigmas. The fluid pulls the pollen off, so use a light touch to avoid damaging the stigmas.
Because receptivity keeps moving up the spadix, pollinate more than once. Come back every day or two while new stigmas are still glistening rather than stopping after a set few days, so the upper flowers are not missed.
Some breeders cover the spadix with a breathable organza bag to reduce stray pollen and larger insects, but fine insects such as thrips can pass through mesh. A bag cannot undo pollen that arrived before it went on, tools carried between plants or overlap of phases, so it reduces rather than guarantees a pure pedigree and does not by itself control humidity or disease.
Phase 3. The Interphase
The fluid dries and stigmas brown. Stop touching it. Wait for the male phase if you want pollen.
Phase 4. The Male Phase (Dehiscence)
Collect Dry Pollen
Days or weeks later the anthers emerge and the spadix takes on a powdery white-to-cream coating of pollen. A loupe can help you look at it, but it cannot confirm viability or diagnose disease. Use obvious signs, such as a dry loose even dusting versus a matted or discolored patch, then collect by gently tapping pollen onto a dark smooth surface. The warocqueanum pollen-maturity checklist shows how to separate normal phase changes from a fading spadix.
Phase 5. Storing Pollen (Proceed Carefully)
If no stigmas are receptive right now, you may want to keep pollen for later. Popular storage advice is least supported at this step, and over-drying or freezing can destroy irreplaceable pollen.
Treat Freezing as an Experiment
The usual rationale, that hydrated cells can form damaging ice crystals when frozen so pollen is dried first, is a general cryobiology principle, but the right moisture level and cold tolerance for Anthurium pollen have not been established. In a Caladium study, fresh pollen germination fell from 35.8% to 0.7% after one day at −20 °C, while storage at 4 °C and about 80% RH kept roughly 32.5% after a day. UF/IFAS likewise describes short-term Anthurium pollen storage in a high-humidity refrigerator environment with the pollen kept from direct contact with water. None of this is a finished Anthurium protocol, but it shows dry-and-freeze is not a safe default.
If you must store pollen, test freezing only on a spare portion. For pollen you cannot replace, use short-term refrigeration in a humid, not wet, container, keep records, and judge success by seed set rather than appearance alone. If you freeze a test portion, let the sealed container return to room temperature before opening it so condensation does not wet the pollen. Compare container and humidity-control roles in the Anthurium pollen-storage product chooser before assembling a kit.
Indicating Silica Gel Desiccant
Indicating silica gel is a reusable general-purpose desiccant, not a calibrated pollen-drying system. Its color change indicates the beads’ moisture exposure. It does not show pollen moisture or viability.
Use It When
You already run repeated dry-storage experiments or maintain several sealed storage containers and can keep loose beads outside the pollen vial.
Skip It When
You only need to hold one small pollen sample, lack a validated target humidity, or cannot keep the loose beads secured away from children and pets. A large jar is excessive for a few microtubes, and Anthurium dry-freeze storage remains experimental.
Verify Stored Pollen
Fresh pollen is always the most reliable. How long stored Anthurium pollen stays usable is not well established, so verify any stored batch by test-pollinating rather than assuming a fixed shelf life.
Choose Compatible Parents and Sow Fresh Seed
Use Sections as a Starting Point
Not all Anthuriums interbreed, and the genus is divided into sections that can help you choose which species to try. Well-known velvet parents are reasonable combinations to test, but reciprocal compatibility, fertility, and seedling vigor still vary by individual cross. Use the Anthurium hybridization and genetics guide to record parent traits and evaluate the resulting seedlings.
Between more distant groups, such as Pachyneurium bird’s-nest types and velvet climbers, or Tetraspermium scandens and popular decorative species, crosses appear harder. The underlying breeding data are limited and mostly centered on A. andraeanum.
Whether a cross yields vigorous or weak offspring depends on the specific parents and genomes involved. Hybrid vigor and sterility are outcomes you measure per cross, not properties you can predict just from species versus complex hybrid labels.
Fruit Development Is Slow
Wait for Mature Fruit
UF/IFAS gives general fruit-maturation ranges of roughly 4–6 months and up to about 5–8 months for Anthurium, while an A. andraeanum developmental study observed fully mature seed at about 24 weeks. Times vary by species and cross, and some species can take longer. Treat any single figure as approximate, and avoid cutting or disturbing the developing spike prematurely.
To judge ripeness, use several cues together rather than one test. Mature berries usually change color from green to orange, red or a pale pearl, push outward from the spadix and loosen so they come away easily. If a berry resists strongly it is probably not ripe. Easy detachment alone is not a validated universal test across species, so combine it with color and elapsed time.
After harvest, remove the pulp because the slippery flesh can encourage mold in storage. Squeeze the seeds out, then rinse and rub off the slime. Some growers use a brief dilute hydrogen peroxide dip to reduce surface pathogens, but Anthurium-specific evidence has not established a safe concentration or contact time. If you try it, use a very dilute solution, keep contact brief and rinse well, or skip it for scarce seed. Then sow promptly. Anthurium seeds are recalcitrant, meaning they are desiccation-sensitive and do not survive drying out. Fresh, prompt sowing is the conservative choice, but do not assume every seed dies within a single day.
The origin, germplasm resources, and breeding of Anthurium andraeanum. An overview
Troubleshoot Failed Pollination
Berries Without a Known Pollination
A few things can explain this, and you cannot always tell them apart from the outside. An unnoticed insect may have moved pollen, phases may have overlapped on the same or a nearby spadix, or the swelling may not contain viable seed at all. The way to know is to check for actual seed and, if pedigree matters, to bag and keep records rather than infer the cross after the fact.
An unpollinated spadix can also swell and green for a while before yellowing and shriveling with no seed inside. This is sometimes called parthenocarpy, but swelling followed by abortion is not proof of it, and there are no good frequency data for how often it happens in Anthurium. Do not count berries until you actually find seed.
The Spadix Rotted to Gray Mush or Black Slime
Diagnose Before Treating
Resist diagnosing the pathogen from appearance alone because several problems can look similar. Colletotrichum gloeosporioides, sometimes called black nose, is an important cause of dark spadix lesions in Anthurium. Xanthomonas can infect flowers, though less commonly, Botrytis is possible, and a superficial gray-brown fungus growing on spadix exudate may be a harmless saprophyte rather than a true disease.
Isolate the affected plant, reduce splashing and handling, sterilize tools and avoid sealing the spadix in a humid bag. If the problem recurs or spreads, use the aroid disease-forensics workflow to document symptoms before seeking an identification.
The Berries Formed, Then the Stem Yellowed and Dropped
Separate Possible Abortion Causes
Abortion has many possible causes, including incompatible or nonviable pollen, failed fertilization, embryo abortion, water or root stress, temperature, pathogens, injury or nutrient and EC problems. You cannot conclude energy deficit from the symptom alone. Breed from mature, well-established plants and keep them healthy and adequately fed.
Correct Only Confirmed Deficiencies
Do not reach for extra calcium and magnesium as a routine fix. Without a substrate or tissue test showing a deficiency, dosing extra nutrients has no demonstrated effect on Anthurium seed set and risks over-fertilizing. Fix any identified deficiency, and otherwise keep feeding balanced and normal.
Record the Cross and Wait for Seed
Breeding takes patience (often months from flower to ripe seed, and longer still before seedlings show what they’ll become). The exact timeline varies a lot by species and growing conditions.
The reward is that a cross such as warocqueanum × crystallinum can produce seedlings that are genuinely new combinations.
Watch for glistening stigmas, label both parents and every pollination date, then sow ripe seed promptly.
Use section membership only as a starting point, and test uncertain storage methods on spare pollen while protecting an irreplaceable sample in short-term refrigeration.
On the first application day, I label the spadix with the seed parent, pollen parent, and a short cross code. I copy that code into a phone note with the pollen collection date, then add a tick for each repeat application instead of replacing the original date. This preserves both the first receptive window and the number of transfers.
I take one final photograph that shows the tag and the whole inflorescence together. If a hanging label fades or disappears while the berries mature, the photo and duplicate note keep the seed parent and pollen source from becoming guesswork.